The Allure of Homemade Pumpkin Butter
As autumn leaves begin to paint the landscape in hues of amber and gold, our kitchens naturally turn to the comforting aromas of the season. At the heart of this autumnal culinary embrace lies the beloved pumpkin, and perhaps no creation captures its essence quite like homemade pumpkin butter. This silky, intensely flavored spread is a staple for many, offering a luxurious experience that goes far beyond a simple jam or preserve. Forget what you think you know about butter; despite its name, easy homemade pumpkin butter contains no actual dairy. Its rich, creamy texture and spreadable consistency are what earn it the 'butter' moniker, much like its fruit-based cousin, apple butter.
Making your own pumpkin butter recipe from scratch is an incredibly rewarding experience. It allows you to control the quality of ingredients, adjust sweetness to your preference, and ensure a perfect blend of warming spices. The result is a truly superior product that elevates everything from breakfast toast to gourmet desserts, and even savory dishes. If you've been on the fence about tackling this seasonal project, allow us to guide you through the process, exploring the pivotal choice between fresh roasted pumpkin and convenient canned puree, along with the magic of essential spices.
Roast or Can? Choosing Your Pumpkin Base
The first crucial decision when embarking on your homemade pumpkin butter journey is whether to start with a fresh pumpkin or opt for canned pumpkin puree. Both methods yield delicious results, but each comes with its own set of advantages and considerations that can influence the final flavor and your overall experience.
Embracing the Fresh Pumpkin Roast
For those seeking the deepest, most authentic pumpkin flavor, roasting a fresh pumpkin is undoubtedly the way to go. This method imparts a nuanced sweetness and a slightly caramelized depth that canned puree simply can't replicate. The roasting process also helps to reduce the pumpkin's water content, concentrating its natural flavors and resulting in a richer, less watery pumpkin butter.
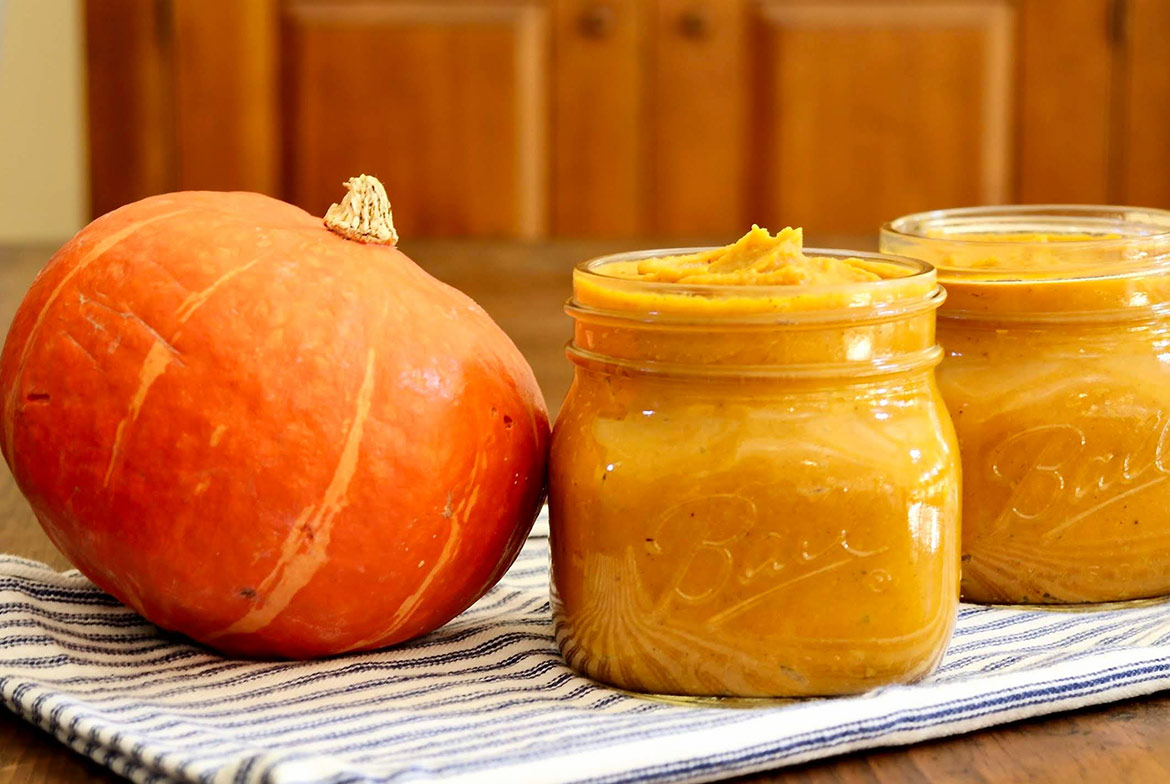
- Choosing Your Pumpkin: Look for smaller, denser varieties like sugar pumpkins, pie pumpkins, or even some types of winter squash such as Kabocha or Red Kuri. These pumpkins have sweeter, less fibrous flesh compared to the large carving pumpkins. A 3-pound sugar pumpkin is often ideal for a standard batch.
- The Roasting Process: Preparation is straightforward. Halve the pumpkin, scoop out the seeds and stringy bits (don't discard the seeds, they can be roasted for a snack!). Lightly brush the cut sides with a neutral oil like vegetable oil. Arrange them cut-side down on a parchment-lined baking sheet and roast in a moderately hot oven (around 350°F or 175°C) until the flesh is incredibly tender when pierced with a fork, typically 45-60 minutes. This slow roasting intensifies the flavor and makes the pumpkin easy to scoop.
- Pros of Roasting: Superior flavor depth, natural sweetness, control over the texture of the initial puree. It's a more traditional approach that truly showcases the pumpkin's natural taste.
The Convenience of Canned Pumpkin Puree
While roasting offers unparalleled flavor, convenience is a major factor for many home cooks. This is where canned pumpkin puree shines. It's a fantastic shortcut that significantly reduces prep time without sacrificing too much on taste, especially if you know how to enhance it.
- Selecting Canned Puree: Always choose 100% pure pumpkin puree, NOT pumpkin pie filling. Pie filling contains added sugars and spices that will throw off your carefully balanced recipe.
- Tips for Using Canned: Canned pumpkin can sometimes be a bit wetter than fresh roasted pumpkin, so you might find your pumpkin butter requires a slightly longer simmering time to reach the desired consistency. You can also lightly cook the canned puree down in a saucepan for a few minutes before adding other ingredients to help reduce moisture and concentrate flavor.
- Pros of Canned: Time-saving, readily available year-round, consistent texture, and less effort. It's an excellent option for busy schedules or when fresh pumpkins aren't in season.
Making the Decision: Which is Right for You?
Ultimately, the choice between roasting and canning comes down to your priorities. If time is of the essence, canned puree is a perfectly acceptable and delicious starting point for your pumpkin butter recipe. If you're willing to invest a little more time for a richer, more profound pumpkin flavor, then roasting a fresh sugar pumpkin is the way to go. Either path leads to a delightful homemade treat, and perhaps trying both methods will help you discover your personal favorite!
Unlocking Flavor: The Essential Spices for Your Pumpkin Butter
While pumpkin is the star, the supporting cast of spices is what truly transforms a simple puree into the magical, aromatic spread we know as pumpkin butter. Think of these spices as the soul of your autumn creation, each contributing a unique note to the symphony of flavors.
- Cinnamon: The undisputed champion of fall spices, cinnamon offers warmth, sweetness, and a comforting aroma. It's often the most prominent spice in any pumpkin recipe. Use ground cinnamon, but consider a good quality variety for maximum impact.
- Ginger: Ground ginger brings a bright, spicy kick and a subtle citrusy undertone that perfectly complements the pumpkin's earthy sweetness. Freshly grated ginger can also be used for an even more vibrant flavor, though ground is more common in recipes.
- Nutmeg: Freshly grated nutmeg is a game-changer. Its intense, sweet, and slightly peppery notes are far superior to pre-ground versions. It adds a sophisticated layer of flavor that beautifully rounds out the spice profile.
- Cloves: A pinch of ground cloves provides a strong, warm, and somewhat bitter counterpoint that prevents the butter from being overly sweet. Use sparingly, as cloves can be potent.
- Allspice: Often described as a blend of cinnamon, nutmeg, and cloves, allspice adds another layer of complexity and a warm, woody note.
- Salt: Don't overlook the power of a tiny pinch of salt (like kosher salt). It's not there to make the butter salty, but rather to enhance and balance all the other flavors, making them pop.
- Vanilla: While not a spice in the traditional sense, a dash of pure vanilla extract (added after cooking) can add a beautiful aromatic finish and deepen the overall flavor profile.
The beauty of homemade pumpkin butter is the ability to customize. While a traditional "pumpkin pie spice" blend might seem convenient, crafting your own spice mix allows for a fresher, more nuanced flavor. Don't be afraid to adjust quantities to suit your taste, perhaps adding a touch more cinnamon or a hint less clove. The key is balance, creating a spice profile that is robust but doesn't overpower the natural sweetness of the pumpkin itself.
Crafting Your Perfect Pumpkin Butter: A Step-by-Step Guide
Once you've prepared your pumpkin base, the remaining steps for making your pumpkin butter recipe are relatively straightforward, blending ingredients and simmering them down to luscious perfection.
Gathering and Combining Your Ingredients
Beyond your pumpkin puree and chosen spices, you'll need a few other key players. Sweeteners like brown sugar and honey (or maple syrup for a different depth) provide sweetness and body. A touch of apple cider adds a fruity tang, while apple cider vinegar provides a crucial acidic balance that brightens the overall flavor profile and prevents the butter from tasting flat. Once your roasted pumpkin flesh is cooled and scooped (or your canned puree is ready), combine it in a food processor or blender with the apple cider until perfectly smooth. Then, add your chosen sweeteners, vinegar, all your aromatic spices, and a pinch of salt. Process again until everything is fully incorporated and incredibly smooth – you want that silky pumpkin butter texture.
The Simmering Transformation
This is where the magic truly happens. Transfer your pumpkin mixture to a heavy-bottomed saucepan. Bring it to a gentle simmer over medium heat, stirring frequently to prevent sticking. Once simmering, reduce the heat to low and continue to cook, stirring occasionally with a rubber spatula. This simmering process is crucial for two reasons: it allows the flavors to meld and deepen, and it reduces the mixture, evaporating excess water and concentrating the pumpkin butter to its ideal thick, spreadable consistency. You'll notice the mixture darken slightly and become visibly thicker. This usually takes about 20-30 minutes, or until the mixture has reduced by about one-third. Be patient and stir regularly, especially towards the end, to prevent scorching the bottom.
Cooling and Enjoying
Once your pumpkin butter has reached the desired consistency, remove it from the heat and allow it to cool completely to room temperature. As it cools, it will thicken even further. The waiting can be the hardest part, but it's essential for the flavors to fully develop and for the texture to set properly.
Beyond Toast: Creative Ways to Enjoy Your Pumpkin Butter
The versatility of homemade pumpkin butter is one of its most delightful qualities. While it’s undeniably superb slathered on warm toast with a dollop of cream cheese, its uses extend far beyond the breakfast table:
- Breakfast Bliss: Swirl it into yogurt, oatmeal, or cream of wheat. Top pancakes, waffles, or French toast for an instant autumnal upgrade.
- Baking & Desserts: Incorporate it into pumpkin pancake or muffin batter for an extra flavor boost. Fold it into whipped cream for a light, spiced topping, or use it as a filling for tarts and pastries.
- Sweet & Savory Pairings: Don't limit yourself to sweet applications! Melt pumpkin butter into a mixture of brown butter and fresh sage for a unique, autumnal pasta sauce. Use it as a glaze for roasted chicken or pork, or spread it on a turkey and brie sandwich for a surprising twist.
- Beverages: Stir a spoonful into your coffee or tea for a festive, spiced drink, or blend it into smoothies.
Storage and Shelf Life: Savoring the Season
One of the great benefits of making your own pumpkin butter recipe is being able to enjoy its comforting flavors for weeks. Once cooled, transfer your pumpkin butter to airtight containers and store it in the refrigerator. It will keep beautifully for 2 to 3 weeks. For longer storage, pumpkin butter freezes exceptionally well. Portion it into freezer-safe containers or even ice cube trays for smaller servings, and it will last for several months, allowing you to enjoy the taste of fall long after the season has passed.
Conclusion
Homemade pumpkin butter is more than just a spread; it's an embodiment of autumn, a culinary hug that warms the soul. Whether you choose to embark on the rewarding journey of roasting a fresh sugar pumpkin or opt for the convenient path of canned puree, the rich, spiced, and velvety result is well worth the effort. The careful blend of cinnamon, ginger, nutmeg, and cloves, balanced with sweeteners and a hint of acidity, creates an unforgettable flavor profile that celebrates the best of the season. So, roll up your sleeves, gather your ingredients, and prepare to fill your kitchen with the irresistible aromas of homemade pumpkin butter – a versatile, comforting, and utterly delicious treat that you'll want to savor all season long.
